Well, it's done and we're moved in. The bedroom anyway. The bathroom will have to wait for just a bit as we rest and recuperate.
This is what we started with.
After the demo.
And now, the finished room.
Lu has since decorated and we've moved in. That bed is a California King to give you some size perspective.
The sitting area. That chair is temporary. Later we'll buy some matching chairs and tables. The curtains over the french door are cream and green.
The walk in closet. I still need to add come bars on the right there for hanging clothes. It extends 2 feet right and 1 foot left of the doorway. Those are sectional drawers. There is more storage for shoes on the left.
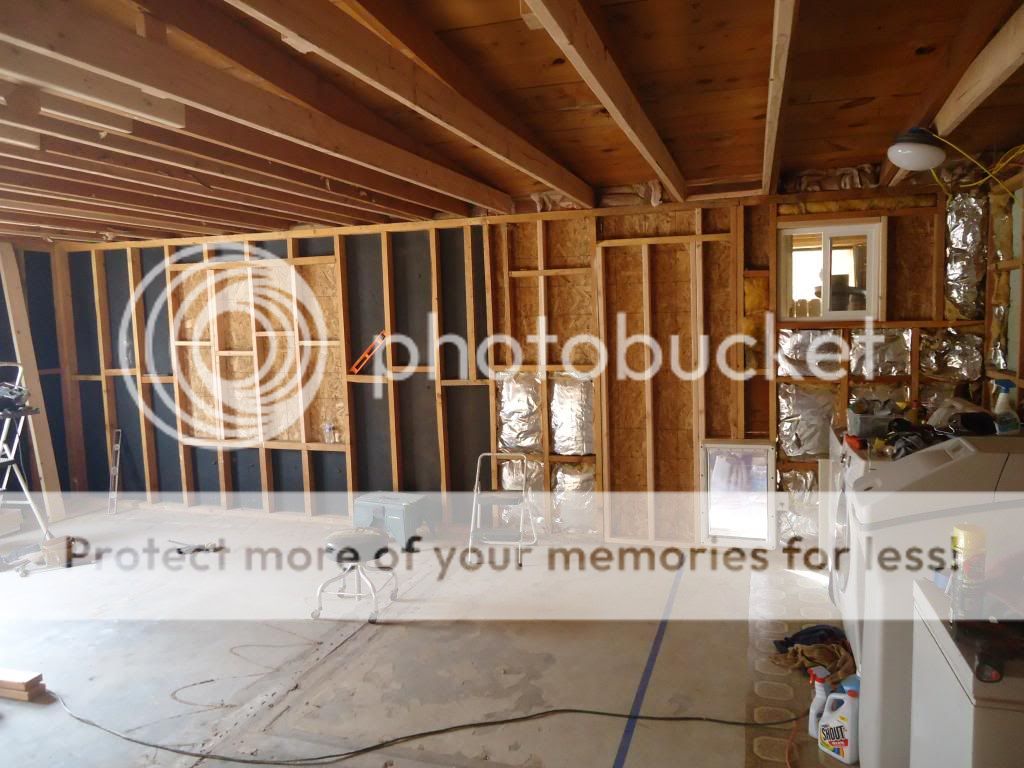
The wall between the bedroom and the laundry room. If you watched the video this is shot from the same place where I was standing and the lovely Lu was pointing to that door we took out. I still have some work to do in here to solate the laundry portion and create a coat closet. Later.
The finished dimensions are 11' 6'' by 18'. It's a very nice space, warm and welcoming. It's the largest bedroom we've ever had with plenty of room to move around and just relax comfortably. Lu is loving it, especially that big closet.
It was a long and challenging build and we're glad to have it behind us. I have a 3 Gun match next weekend but after that we'll tackle finishing the new bathroom. For now though we're just enjoying the fruits of our labor. I hope you've enjoyed following along with us. We have certainly enjoyed bringing it to you and appreciate all your kind words and support.
Six, Lu and Angus.
'The true Soldier fights not because he hates what is in front of him, but because He loves what is behind him.' -G. K. Chesterton
29 November 2013
28 November 2013
Happy Thanksgiving
My brother and his family are here and we're having a great time. Sarge (my Sarge not LauraB's) is in the hospital recovering from some pretty extensive neck surgery yesterday. He came through it well and is resting, if not comfortably at least well medicated. We'll be sending him some turkey sandwiches and wishing he were here with us today.
I hope you all have a blessed and happy day. Lu and I send each and every one of you all our prayers and best wishes.
We also remember our men and women serving overseas. We wish you were home and pray for your swift and safe return to these shores.
May God bless you all.
And to my Jewish friends; Chag Chanukah Sameach!
Six, Lu and Angus
27 November 2013
MB Remodel Pt. X
Texture and paint. This is new construction so the equipment and techniques I used will be different than those for a repair. I'll discuss those differences where they come up. I invite anyone who has more experience and knowledge than me to chime in here or correct me where I get something wrong. Looking at you here Car Guy.
I use a compressor and spray gun to put on texture if the job is bigger than a small repair. Again, I don't have a gun preference this is just the one they had when I bought it a few years ago. It seems to work well. It has changeable apertures and an adjustable feed. If you're doing small repair the canned texture does work fairly well. Just pay strict attention to the instructions. Here's an example of where I used it on the California house spare bedroom. I know there are some out there who can apply it by flicking it on with a paint brush but that's a technique beyond my talents at present.
The screw adjuster at the back of the gun allows me to control how much texture is getting fed in so I can dial in the density of the spray.
Texture is not mud exactly. I think it has more to do with consistency than anything else as I've thinned down mud and sprayed it as texture but I recommend using texture where you can.
It tends to float the water to the top during storage so give it a good stir prior to using.
Then it's time to apply. There's really no finesse here, just load up the hopper and commence to spraying. I watch carefully to make sure I'm getting even coverage with as little glop as possible.
You'll end up with something like this. For us this was the final product, a pebble finish. Lu and I both like the look and it's easier to do.
But if you want a knock down look there's another step. First, you'll need a knock down knife. I like rubber 6 inch. The rubber gives me fewer lines and the shorter size gives me better control. YMMV. Clean off your knife after every pass, especially if you're getting lines in the knockdown.
Ok, If you're doing knockdown this is where it gets tricky. You'll have to decide what size you want. I refer to them as large curd and small curd. If you're matching an existing finish you'll want to see what's there and go with the same. If it's new construction you'll have to decide on the look you want. That's important because knockdown texture is about timing as much as anything else. Large curd requires a wetter texture, small drier. Drier is easier to work, wetter harder and leaves more lines. Spray on your texture to a small area, or even better a test patch on a piece of discarded drywall, and then check it frequently until it gets to the desired moisture content. Check the elapsed time. That's what you have to work with. I did this very small patch of knockdown in an area of the closet that will be covered by stack able storage. This was about an hour after application and is an example of small curd knockdown. It's actually a little too small. I'd move up my timing by about 15 minutes or so if we were doing knockdown. If I wanted large curd it'd be about 30 minutes (or even sooner) but I'd check it very frequently to make sure. Monkey Wrangler, I hope that helps.
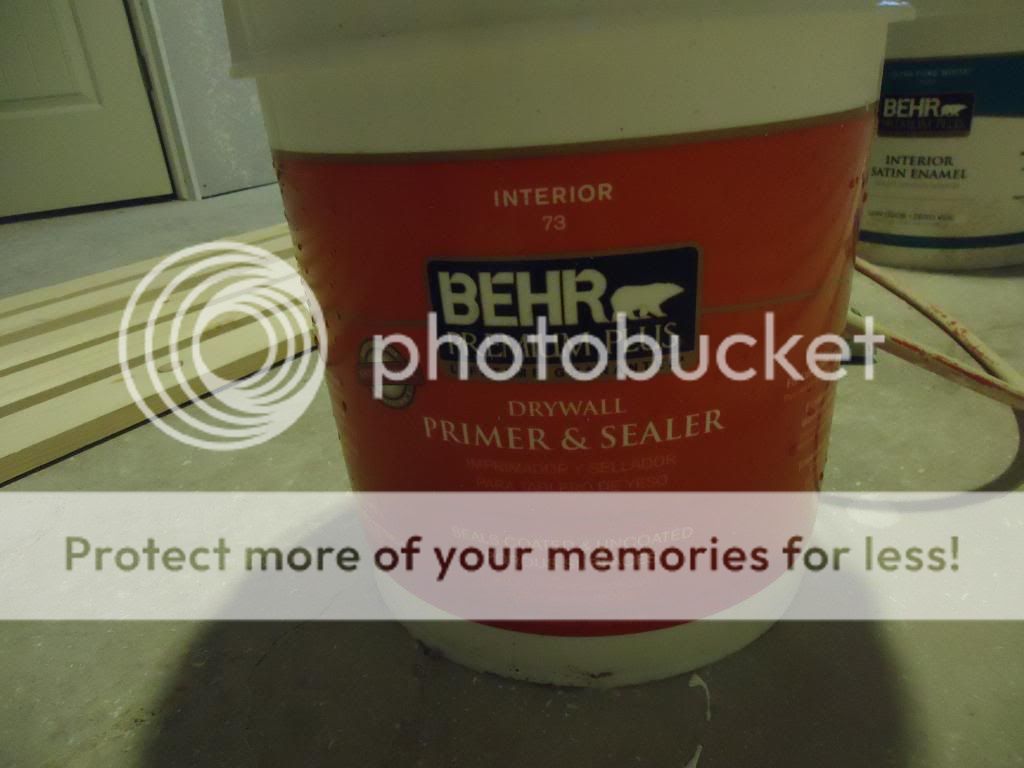
After the texture dried it was time to paint. New drywall will suck in paint like a dry sponge. Best to bite the bullet and use a good primer designed to prime and seal new drywall.
One coat of primer and then paint.
We have a sprayer but it chose this moment to fail so Lu ended up rolling the entire room. 3 coats, one primer and two paint. 2 paint coats were necessary primarily because of the texture finish we chose. That pebble look tends to leave some voids that are hard to see. Mom In Law came by to help which is good since I hate painting and will only do it at the point of a gun. Luckily Lu likes it and has completely consumed the job of our paint contractor.
One of her tricks is to lay out the trim and paint it prior to installation. Or even cutting to fit. She says it's way easier to patch seams and do general touch up once it's in as opposed to cutting in the baseboards after they're installed over new carpeting. Hey, I'm just the carpenter here but it seems to work really well.
You will find stuff you screwed up. Don't get bent out of shape about it. Just repair them and forget about it.
So. The room is actually finished. Paint was done on Friday and we spent the weekend doing all the little stuff. Carpet went in on Monday and I put in the baseboards and trim just after they were done. Then it was putting together the closet storage system and more fiddly stuff. I ended up drywalling the hallway just because I hate leaving bare stud walls visible. We moved in last night but I'm going to make you wait one more day to show you the final product. I think it turned out really well. I know that Lu is one happy woman and that's what really matters to me. A new bedroom and a happy wife? Doesn't get any better than that.
Six
We purchased every product we used and I showed I this post. No one compensated us or even asked for a review. This is just stuff we've used before and tend to like. YMMV.
Labels:
construction,
home repair,
house,
master bedroom,
paint,
projects,
remodel,
texture
24 November 2013
Sunday Kipling
Texture and paint are done!! Carpet is scheduled for Monday. I'll have a write up soonest. I promised Monkey Wrangler I'd discuss and show how we did our texture. We should be moving into our new master bedroom Monday evening, maybe Tuesday morning. It's been a long remodel but the end is in sight. Today we'll do some clean up to get ready for the carpet guys. Thanks to you all for your kind words and encouragement.
Six
Six
The Miracles
I sent a message to my dear
 A thousand leagues and more to Her
The dumb sea-levels thrilled to hear,
 And Lost Atlantis bore to Her.

Behind my message hard I came,
 And nigh had found a grave for me;
But that I launched of steel and flame
 Did war against the wave for me.

Uprose the deep, by gale on gale,
 To bid me change my mind again
He broke his teeth along my rail,
 And, roaring, swung behind again.

I stayed the sun at noon to tell
 My way across the waste of it;
I read the storm before it fell
 And made the better haste of it.

Afar, I hailed the land at night
 The towers I built had heard of me
And, ere my rocket reached its height,
 Had flashed my Love the word of me.

Earth sold her chosen men of strength
 (They lived and strove and died for me)
To drive my road a nation's length,
 And toss the miles aside for me.

I snatched their toil to serve my needs
 Too slow their fleetest flew for me
I tired twenty smoking steeds,
 And bade them bait a new for me.

I sent the lightnings forth to see
 Where hour by hour She waited me.
Among ten million one was She,
 And surely all men hated me!

Dawn ran to meet me at my goal
 Ah, day no tongue shall tell again!
And little folk of little soul
 Rose up to buy and sell again!
22 November 2013
Michael's Belts
In early 2011 I had Michael, of Michael's Custom Holster's fame, made me a custom race rig for IDPA. I ended up shooting USPSA instead so the holster has been mostly relegated to occasional concealed carry use but the belt has become a daily wear item. That's not to say I haven't used and don't love my holster. I do. But that belt has been really put through it's paces and I wanted to give a long term write up on it as it nears 3 years of virtually continuous use.
I'm old fashioned. I tuck in my shirts and wear a belt with every pair of pants I own except for sweats. And jammies of course. If I thought Lu wouldn't kick me out of the marriage bed I'd wear one with them as well. When I first got that belt I figured it would stay with the rig and only get used when I competed. Then I went USPSA and, well you know the rest. The more I looked at that belt the more it struck me that it was just too fine a piece of leather accoutrement to leave it in my gear bag. So I started wearing it around.
It started out slowly. I mean the thing is an absolute work of art and the last thing I wanted to do was ruin it. See, I'm a little absent minded. Lu laughs at me for constantly finding myself hip deep in a project, having completely forgotten that I'm wearing my good clothes. Laughing may be the wrong word. Sighing is probably closer. So I was careful. Then one day I was doing another of those labor intensive and clothing destroying projects I keep getting roped into when I realized I had my good belt on. My Michael's that I swore I wouldn't screw up. I was aghast. Then I realized that the thing was taking everything I could throw it, yawning and asking me if that was the best I could do. It may have called me a sissy at one point but I was distracted from nailing my hand to a 2x4 so I can't be absolutely positive about that. Anyway. I started wearing it every day, everywhere and doing everything. From concrete to home remodel to USPSA. Yep, it finally got to compete.
So how's it look all these years and hard miles later? Like this;
And this;
Now, that is clearly a well used belt and yet it shows only reasonable cosmetic wear. Here's where the holster rides. That's nearly 3 years of constant carry and even competition wear mind you. And remember, this is a custom basketweave finish. Still looks great.
The belt has lost none of it's thickness and structural rigidity.
Oh, it's gotten softer and more pliable from wear but I'd risk my life to it's strength any day. I'm pretty sure I could tow my truck with it. It has become so comfortable, like an old and trusted friend.
The lining and buckle holes. And remember, I'm pretty active and a diehard DIYer so this belt gets a lot of very hard use. Know how those thinner leather belts get all stretched and the holes elongated from trying to suck in your gut and over tighten your belt when the women folks are around? No? Just me? Well, not with this belt. It just says "You go ahead and eat that cow big guy. I've got this."
The buckle shows very little wear and no looseness at all. Again, I'd trust my life to this piece of equipment in a hot second. Bond like, hanging from a chopper by a rope attached to my belt, shooting Zombies one handed and uttering memorable quips to a beautiful woman. Well, maybe trading sarcastic remarks with Car Guy.
Overall the belt is stylish, well crafted and about as sturdy as anything I've ever wrapped around my waist. I'll never gird my loins (or whatever one girds) with anything lesser ever, ever again. You couldn't pry this one out of my hands with a winch. A wench maybe but not a winch. And only if it's Lu 'cause she knows where I sleep. I anticipate wearing this belt for misadventures and ill thought out projects for many years to come. And that's not something you can say about many products out there these days.
Michael is also a joy to work with. Talk about customer service. Heck, based on just the one purchase I feel as if I've made a friend for life. Though I'm pretty sure he should buy me a beer should we ever meet.
Now all this may sound like Michael saved my life back in 'Nam in '65, carrying me out through the trackless jungles on his back and I'm just trying to pay him back. Nothing could be further from the truth. I bought this belt with my very own dear coin and I will do so again. He has no idea I was going to write this and, truth to tell, will probably be just a bit embarrassed by my gushing. I just feel that great folks providing great stuff should be celebrated and the word passed. I recommend Michael and his stuff unreservedly. If it can pass the Six 3 year test it can handle pretty much anything.
If this review has whetted your appetite you can go to Michael's site linked above or visit his Best Belt site directly here. I love this belt. In case I was being a little too subtle.
Six
21 November 2013
JFK
I am about to commit an outrage. Ready?
I don't like JFK. I certainly do not think he was one of our greatest presidents. In fact, he was one of our worst. I get the frownies when I hear or read otherwise reasonable persons say that JFK would be considered a good Conservative in these times. He wouldn't and isn't. That's butt smoke from the squishies and liars. JFK was the SWPL Obama.
My reasons? Rather than blather on in my simplistic fashion I'll let DiploMad take over. Read it here. He says it all and really encompasses my feelings about JFK and the Kennedy's in general. I mean, they corrupted The Terminator for crying out loud.
Yes, the assassination of any sitting President is a badness thing. No, there wasn't a conspiracy by the CIA/Cubans/Mafia/Johnson/Whoever. JFK was killed by a crazy, traitorous, wanna be Communist Hero, loser (BIRM). Please stop feeding that particular trope as well as the one that imagines JFK as a would be conservative hero in Democrat clothing. He was a bottom feeder who was no more competent for the office of president than the current occupant. He was as liberal as they come, just more constrained by what was still then a majority conservative country who very nearly got us all killed in a rain of mushroom clouds. He was a drug addict, incompetent and a sexual deviant.
JFK an American Icon? Spare me.
Six
20 November 2013
MB Remodel Part IX - Drywall
I've said many time how much I hate drywall but there are a few things you can do to make it a bit easier. The first thing for me is to remember that mud and tape cover a myriad of sins. There's nothing worse than putting up a panel, find that it's a little too big and then spending 15 minutes trimming it to fit. I tend to cut everything a bit small and then rely on Lu's finishing skills to make it all fit and look good. Works for us.
This may be known to many of you but it was new to me. When cutting out openings for outlets and switches I've always relied on measuring and cutting prior to putting the panel against the wall with mixed results. It's awful easy to make a mistake here and either cutting too big or too small. Not to mention just plain missing altogether and risking ruining a panel of sheetrock. With the pot lights I had no choice but on the outlets and switch boxes I tried a new (to me) tool.
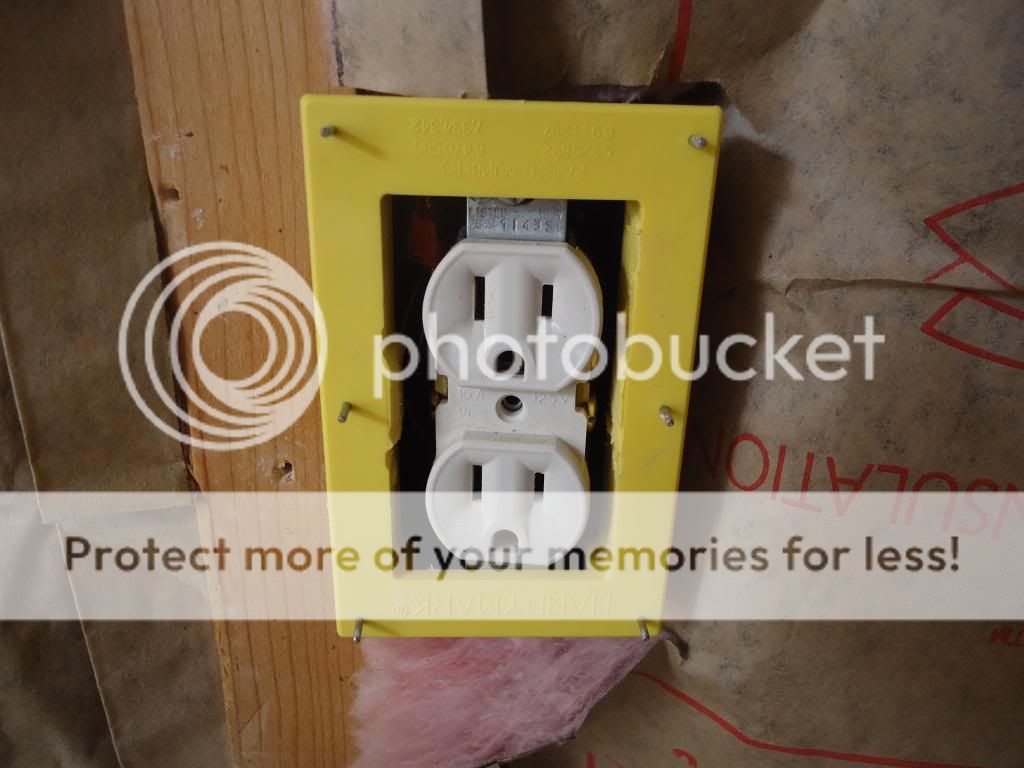
That's the Handy Mark. It makes marking the holes much easier and surer.
Here's how it works. It fits over and into the box. It has 6 small metal studs that stick out. Put the panel into place and press it hard against the box. The tool is supposed to be used on an empty box but I modified it to fit these that already have the outlet installed. You can see the cuts in the center if you look closely.
When you take the panel down the Handy Mark is stuck in the back side.
Remove the tool and you'll see 6 small marks.
Connect the dots and there's your outlet/switch box cutout.I added a little to the top and bottom to allow for the wings on the top and bottom of the outlets and switches.
I like my Dremel with a cutoff bit for this. Do a plunge to get started and then just follow your lines.
Perfect cutouts every time. It works for both outlet and single gang switch boxes. Nifty. I like this tool very much. It's now a permanent addition to my drywall toolbox. Works like stink.
Lu and I try to divide up the work where we can. I hung while she started mudding and taping. To that end I find panel carries very useful for moving individual sheets of drywall by myself. Hook them on and you can easily carry panels to wherever you need them with no assistance. Thanks to Car guy for giving me these. He swears he's done with big drywall jobs.
It was a very long day but by about 7:30 last night the drywall was finished. Starting to look like an actual room. The ceilings are hardest. I can hang walls alone but it took both of us to get those ceiling panels up.
The walk in closet.
Since there won't be a door here we went with a bull nose to finish the corners. It's a pain to put up but it'll look great when finished.
This morning Lu did a second coat of mud on all the joints while I did some clean up. Today we're waiting for that to dry, then we'll get in there and sand everything smooth. By tomorrow we'll be ready for texture. We went down today and bought 7 gallons of texture, 5 of primer and 5 of paint. When you're painting over new drywall make sure you prime with something made for sealing that new surface or you'll risk the paint soaking in and having to do a second coat. Primer is a lot less expensive than paint.
We're finally in the last stages of this remodel which is a good thing since carpet is scheduled for installation on Monday. That gives us 5 days (counting today) to finish everything except the trim. We have the trim and Lu will paint it when she does the room. Then we'll set it aside until the carpet is in. We'll cut the painted trim to fit and put it in. By Tuesday we expect to be moving in.
Getting so close. More tomorrow.
Six
Disclaimer. I paid for the Handy Mark out of my own wallet. No one asked me to try it or offered me any incentives. In fact no one even suggested it. I just happened to spot it on the shelf at the Big Box store and decided to give it a try. Most likely nary a soul on Earth even cares that I did. So there.
Labels:
construction,
drywall,
house,
master bedroom,
projects,
remodel
19 November 2013
Quick Update
We're insulating.
And drywalling.
Actually got a good bit done. We should be finished and ready for texture and paint by Wednesday.
Gonna be a long week.
Six
And drywalling.
Actually got a good bit done. We should be finished and ready for texture and paint by Wednesday.
Gonna be a long week.
Six
Labels:
construction,
house,
master bedroom,
projects,
remodel,
update
17 November 2013
Sunday Kipling
Insulation and drywall are now going in. Have I mentioned how much I hate doing drywall? Cuz I do.
Times are certainly interesting at the moment. Makes me wonder what new disaster tomorrow brings to the national stage.
Went shooting for an hour yesterday and the suckage was extreme. Man, I gotta finish this remodel so I can get back to the important stuff.
I hope you are all well and happy. Lu and I are doing fine though Angus seems to believe his walkies are being unfairly curtailed. Spoiled dog.
Six
The Parting of the Column
“…On the instant a mixed detachment
of Colonials left – for Cape Town, there to
rejoin their respective homeward-bound con-
tingents, after fifteen months’ service in the
field. They were escorted to the station by the
regular troops in the garrison and the bulk of
Colonel‘s column, which has just come in to
refit, preparatory for further operations. The
leave-taking was of the most cordial character,
the men cheering each other continuously.”
ANY NEWSPAPER, DURING THE SOUTH AFRICAN WAR.

We’ve rode and fought and ate and drunk
as rations come to hand,
Together for a year and more around this stinkin’ land:
Now you are goin’ home again, but we must see it through.
We needn’t tell we liked you well.
Good-by – good luck to you!

You ‘ad no special call to come, and so you doubled out,
And learned us how to camp and cook
an’ steal a horse and scout.
What ever game we fancied most, you joyful played it too,
And rather better of the whole. Good-by – good luck to you!

There isn’t much we ‘aven’t shared, since Kruger cut and run,
The same old work, the same old scoff,
the same old dust and sun;
The same old chance that laid us out,
or winked an’ let us through;
The same old Life, the same old Death.
Good-by – good luck to you!

Our blood ‘as truly mixed with yours –
all down the Red Cross train.
We’ve bit the same thermometer
in Bloeming-typhoidtein,
We’ve ‘ad the same old temp’rature –
the same relapses too,
The same old saw-backed fever-chart.
Good-by – good luck to you!

But ‘twasn’t merely this an’ that
(which all the world may know),
‘Twas how you talked an’ looked at things
which made us like you so.
All independent, queer an’ odd, but most amazin’ new.
The same old saw-backed fever-chart.
Good-by – good luck to you!

Think o’ the stories round the fire,
the tales along the trek –
O’ Calgary an’ Wellin’ton, an’ Sydney and Quebec;
Of mine an’ farm, an’ ranch an’ run,
an’ moose an’ caribou,
An’ parrots peckin’ lambs to death!
Good-by – good luck to you!

We’ve seen your ‘ome by world o’ mouth,
we’ve watched your rivers shine,
We’ve ‘eard your bloomin’ forests blow
of eucalyp’ and pine;
Your young, gay countries north and south,
we feel we own ‘em too,
For they was made by rank an’ file.
Good-by – good luck to you!

We’ll never read the papers now without inquirin’ first
For word from all those friendly drops
where you were born an’ nursed.
Why, Dawson, Galle, an’ Montreal – Port Darwin – Timaru,
They’re only just across the road!
Good-by – good luck to you!

Good-by! – So-long! Don’t lose yourselves –
nor us, nor all kind friends,
But tell the girls your side the drift –
we’re comin’ – when it ends!
Good-by, you bloomin’ Atlasses!
You’ve taught us somethin’ new:
The world’s no bigger than a kraal.
Good-by – good luck to you!
14 November 2013
MB Remodel PT VIII
We've been wiring. I should finish up today. It went pretty much without fanfare but I did two things differently. If you followed the Kid's Room remodel you may remember that junction box I found in the attic that was open and filled with insulation. I talked about how I do not like junction boxes. But sometimes you need more capacity or have a wiring challenge that needs something different. I had just such an issue in this remodel.
I'm a simple electrician. I have neither the experience nor training to know all the tricks. I tend to run simple circuits. That's fine and makes things easy and robust though I do use a lot of wire. Plus my main service box is getting a bit cluttered. I needed a lot of circuits for this build. We'll have three switched lights in the bathroom, one in the closet, a switched overhead light in the bedroom, a ceiling fan and a lot of outlets including a GFCI in the bathroom. My solution?
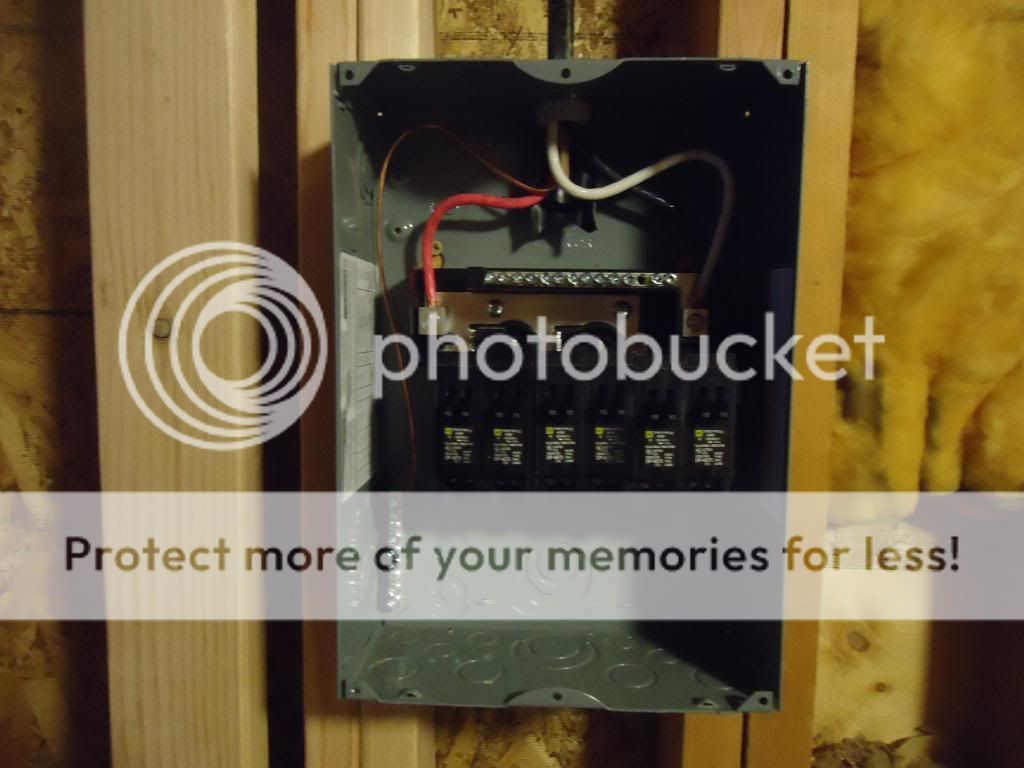
That's a 100 Amp sub service panel though I'm only running 50. It's wired with 6 gauge wire, 6/3 with ground. I have a 50 Amp breaker in the main service box connected to and supplying power to this box. That's the red, white, black and copper wires you see coming in from the top. I had to add a grounding bus, that's the small bus on the bottom left. Plus I had to put in a larger 6 gauge connector on the main service box's neutral bus but that's it. I now have 6 double throw breakers and 12 circuits available all for the cost of a single wire installation in my main service. Plus it's in the Laundry Room for easy access. The cost is reasonable. 17 bucks for the panel, 48 for the breakers, a few for the bus and connector and 40 for 20 feet of 6 gauge wire (Yikes). I can wire the entire build from here and because it's so near my runs are shorter and I don't have to try and feed a lot of new wires through the small attic to the main service.
I've never done recessed lighting before. I don't know why, it just never came up. But on this build we decided to give them a try. Car Guy encouraged me and after doing the installation and seeing the results I can understand why.
That's a Commercial Electric brand recessed light also called pot lights. I don't have any brand loyalty, it's just what Home Depot had in stock. They're simple, rugged and easy to install. Those arms you see are telescoping and fasten to the joists in 4 places. They're pre-set for the correct drywall set back. The pot glides back and forth on the arms so you can set it exactly where you want it.
And they're prewired. Makes hooking them up a snap. When you're done everything tucks back into a small, closeable box. Nifty. It's important to know what kind of light you want. These are for new construction not remodel through existing drywall. Since this area will be insulated I needed lights that are rated for insulation contact. The lights will be marked IC or Non IC for Insulation Contact. Don't make a mistake here. It's a fire hazard. Since this one is directly above the shower I also needed one that was air tight and rated for wet spaces. Shop smart and if you're unsure get some help. I did.
How do they work? Pretty dang well. That's a single overhead in the center of the bedroom. I was unsure if I even wanted this light but after I put it in I'm glad I did. Lots of useful light and no hanging fixture. The switch is near the room entrance.
The bathroom on the left and the closet on the right. The bathroom will also get a fan/light combo and a vanity light on a three gang switch.
The outlets were easy if a pain to wire in. Now we can finally heat the space as we work. Plus, you know, testing. And stuff.
The wiring will be done today and drywall started tomorrow. I'm happy with the wiring plan. We have a lot of useful lights and plenty of outlets. The sub service panel worked extremely well. It's a technique I will almost certainly use again. Like when I finally get around to wiring up the garage/shop.
Next up, drywall, texture and paint. We still have along way to go but the end is in sight.
Six
Subscribe to:
Comments (Atom)


