
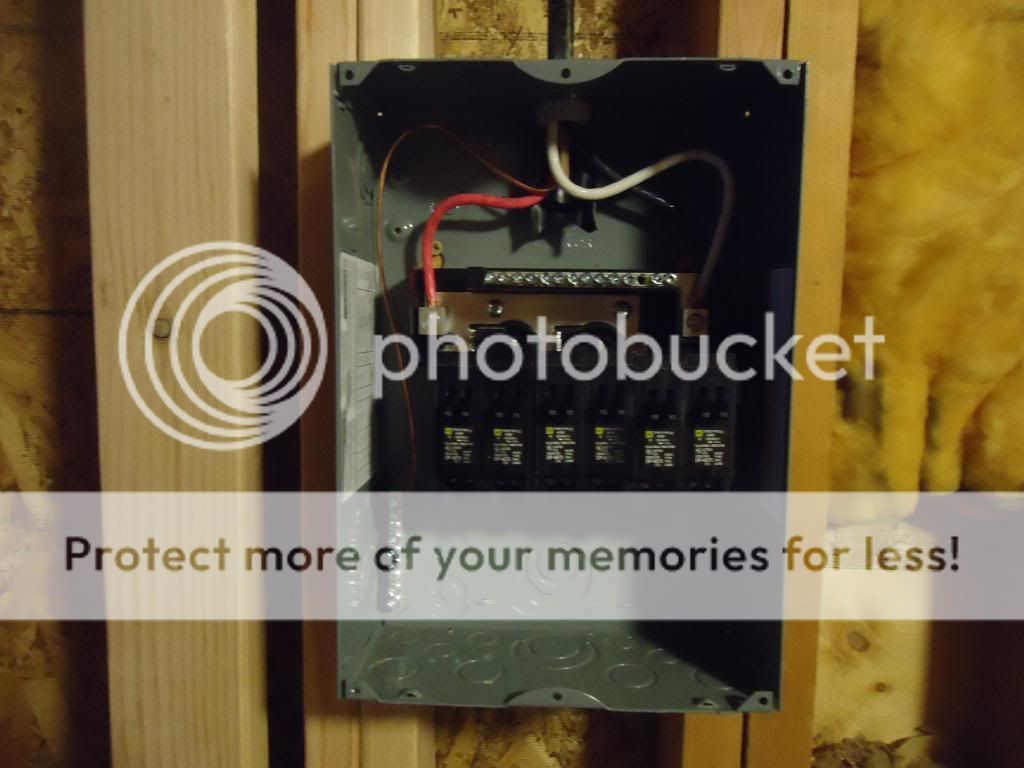
I'm a simple electrician. I have neither the experience nor training to know all the tricks. I tend to run simple circuits. That's fine and makes things easy and robust though I do use a lot of wire. Plus my main service box is getting a bit cluttered. I needed a lot of circuits for this build. We'll have three switched lights in the bathroom, one in the closet, a switched overhead light in the bedroom, a ceiling fan and a lot of outlets including a GFCI in the bathroom. My solution?
That's a 100 Amp sub service panel though I'm only running 50. It's wired with 6 gauge wire, 6/3 with ground. I have a 50 Amp breaker in the main service box connected to and supplying power to this box. That's the red, white, black and copper wires you see coming in from the top. I had to add a grounding bus, that's the small bus on the bottom left. Plus I had to put in a larger 6 gauge connector on the main service box's neutral bus but that's it. I now have 6 double throw breakers and 12 circuits available all for the cost of a single wire installation in my main service. Plus it's in the Laundry Room for easy access. The cost is reasonable. 17 bucks for the panel, 48 for the breakers, a few for the bus and connector and 40 for 20 feet of 6 gauge wire (Yikes). I can wire the entire build from here and because it's so near my runs are shorter and I don't have to try and feed a lot of new wires through the small attic to the main service.
I've never done recessed lighting before. I don't know why, it just never came up. But on this build we decided to give them a try. Car Guy encouraged me and after doing the installation and seeing the results I can understand why.
That's a Commercial Electric brand recessed light also called pot lights. I don't have any brand loyalty, it's just what Home Depot had in stock. They're simple, rugged and easy to install. Those arms you see are telescoping and fasten to the joists in 4 places. They're pre-set for the correct drywall set back. The pot glides back and forth on the arms so you can set it exactly where you want it.

And they're prewired. Makes hooking them up a snap. When you're done everything tucks back into a small, closeable box. Nifty. It's important to know what kind of light you want. These are for new construction not remodel through existing drywall. Since this area will be insulated I needed lights that are rated for insulation contact. The lights will be marked IC or Non IC for Insulation Contact. Don't make a mistake here. It's a fire hazard. Since this one is directly above the shower I also needed one that was air tight and rated for wet spaces. Shop smart and if you're unsure get some help. I did.

How do they work? Pretty dang well. That's a single overhead in the center of the bedroom. I was unsure if I even wanted this light but after I put it in I'm glad I did. Lots of useful light and no hanging fixture. The switch is near the room entrance.

The bathroom on the left and the closet on the right. The bathroom will also get a fan/light combo and a vanity light on a three gang switch.

The outlets were easy if a pain to wire in. Now we can finally heat the space as we work. Plus, you know, testing. And stuff.

The wiring will be done today and drywall started tomorrow. I'm happy with the wiring plan. We have a lot of useful lights and plenty of outlets. The sub service panel worked extremely well. It's a technique I will almost certainly use again. Like when I finally get around to wiring up the garage/shop.
Next up, drywall, texture and paint. We still have along way to go but the end is in sight.
Six
5 comments:
I'm curious to see your drywall and texture techniques. We are working on patching some textured drywall. The patching isn't difficult, but trying to get the texture close to the existing stuff is a PITA!
You're moving right along, and I'm sure Lu is 'pushing' a bit cause she wants HER space back... :-)
We'll put it up and do a double mud over the tape with a sanding in between coats. I apply texture with an air gun. It uses up an awful lot of texture mud but it's the best way to do large spaces. There are canned textures but I've never had great success with them. My advice is to go ahead and get a small texture gun. It has changeable tips so you can dial in the exact texture you want. I'll do a write up when I do the texture MW. I hope it'll help :)
You got that right NFO. She's a bit tired of the mess!
Like your way of explaining how you do things and why, so even I can follow along.
Thanks Brighid. I never know if this stuff is all common knowledge or even of any interest at all. I really appreciate your kind words.
Post a Comment