I've said many time how much I hate drywall but there are a few things you can do to make it a bit easier. The first thing for me is to remember that mud and tape cover a myriad of sins. There's nothing worse than putting up a panel, find that it's a little too big and then spending 15 minutes trimming it to fit. I tend to cut everything a bit small and then rely on Lu's finishing skills to make it all fit and look good. Works for us.
This may be known to many of you but it was new to me. When cutting out openings for outlets and switches I've always relied on measuring and cutting prior to putting the panel against the wall with mixed results. It's awful easy to make a mistake here and either cutting too big or too small. Not to mention just plain missing altogether and risking ruining a panel of sheetrock. With the pot lights I had no choice but on the outlets and switch boxes I tried a new (to me) tool.
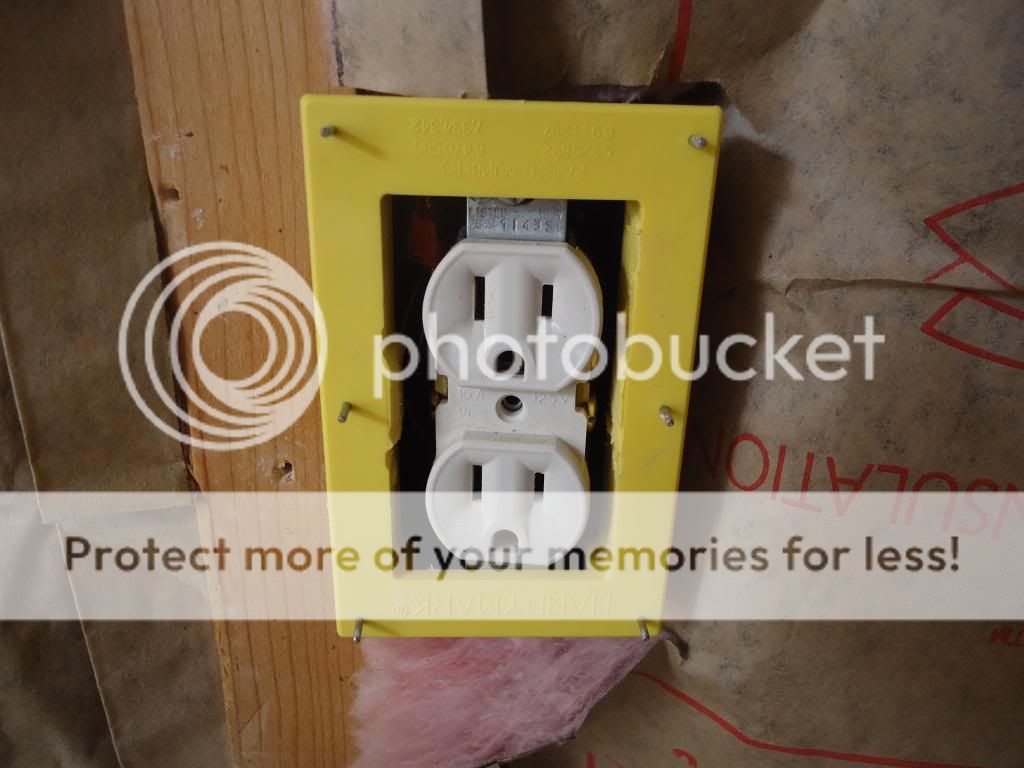
That's the Handy Mark. It makes marking the holes much easier and surer.
Here's how it works. It fits over and into the box. It has 6 small metal studs that stick out. Put the panel into place and press it hard against the box. The tool is supposed to be used on an empty box but I modified it to fit these that already have the outlet installed. You can see the cuts in the center if you look closely.
When you take the panel down the Handy Mark is stuck in the back side.
Remove the tool and you'll see 6 small marks.
Connect the dots and there's your outlet/switch box cutout.I added a little to the top and bottom to allow for the wings on the top and bottom of the outlets and switches.
I like my Dremel with a cutoff bit for this. Do a plunge to get started and then just follow your lines.
Perfect cutouts every time. It works for both outlet and single gang switch boxes. Nifty. I like this tool very much. It's now a permanent addition to my drywall toolbox. Works like stink.
Lu and I try to divide up the work where we can. I hung while she started mudding and taping. To that end I find panel carries very useful for moving individual sheets of drywall by myself. Hook them on and you can easily carry panels to wherever you need them with no assistance. Thanks to Car guy for giving me these. He swears he's done with big drywall jobs.
It was a very long day but by about 7:30 last night the drywall was finished. Starting to look like an actual room. The ceilings are hardest. I can hang walls alone but it took both of us to get those ceiling panels up.
The walk in closet.
Since there won't be a door here we went with a bull nose to finish the corners. It's a pain to put up but it'll look great when finished.
This morning Lu did a second coat of mud on all the joints while I did some clean up. Today we're waiting for that to dry, then we'll get in there and sand everything smooth. By tomorrow we'll be ready for texture. We went down today and bought 7 gallons of texture, 5 of primer and 5 of paint. When you're painting over new drywall make sure you prime with something made for sealing that new surface or you'll risk the paint soaking in and having to do a second coat. Primer is a lot less expensive than paint.
We're finally in the last stages of this remodel which is a good thing since carpet is scheduled for installation on Monday. That gives us 5 days (counting today) to finish everything except the trim. We have the trim and Lu will paint it when she does the room. Then we'll set it aside until the carpet is in. We'll cut the painted trim to fit and put it in. By Tuesday we expect to be moving in.
Getting so close. More tomorrow.
Six
Disclaimer. I paid for the Handy Mark out of my own wallet. No one asked me to try it or offered me any incentives. In fact no one even suggested it. I just happened to spot it on the shelf at the Big Box store and decided to give it a try. Most likely nary a soul on Earth even cares that I did. So there.


6 comments:
The Handy Mark is NEAT! Good looking stuff there. Sadly, I'm totally inept on such matters.
So when we are ready to start knocking walls down, how much will you charge me? :D
It really is pretty neat Keads. And I've seen examples of your work. I could have really used you during the wiring!
I work cheap Instinct!
Looking Good!!! I hope to never have to do it again, but if I do, I'm definitely buying that HandyMark toy. Too cool!
I showed DH that marker tool and he seemed to think it was a good idea too.
You two are awesome! The scale of work you did on the remodel is amazing. I would never have felt comfortable getting in that deep into it.
Remember now, though Six, you have to show me how you are doing all that knockdown texturing!
I wasn't sure if I was being a goober for using it or not CG but after trying it out I'm sold. It really works well.
Tell DH I recommend it MW. I hate measuring out those holes. The thing really cut my time down. Hey, Handy Tool really should be paying me for this review! I won't be doing knockdown but I promise a thorough look at my texturing. I'm using the fine spray nozzle on the gun and we're leaving the texture raised for this project. We've seen it before and really like the look.
Post a Comment