Lu and I went to Big Box Home Remodel Store today and I bought three 8 foot sections of 3/8's inch rebar. I chose 3/8's because it's light, should (there's that word again) be strong enough and is cheap. Less than ten bucks for all three.
Here's the plan.
-The target stand will be 2 feet wide and 6 feet tall with a cross piece 3 feet from the top. It will have 2 feet, each 2 foot long with another 2 foot cross brace between them. Think an H shaped footing.
-Take two of the 8 footers and cut 2 feet off each. Then cut two more 2 foot sections out of the last 8 foot rebar. This will give us four 2 foot sections and two 6 foot sections. We'll also need 2 uprights that have an inside diameter approximately equal to the outside diameter of the rebar. We'll need a mounting system, something to cut metal and a welder.
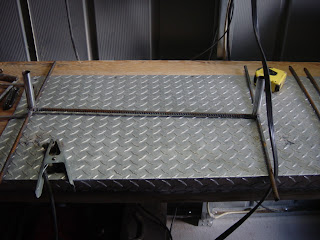
Ok. Here's two of the 2 footers with the two 6 footers.
Here's the footing already cut and welded. I found 2 pieces of pipe just laying around to use as the uprights receptacles. These will hold the 6 foot sections when the stand is assembled. They were too large inside diameter but I'll address that later in the build. You can see the H shape I was talking about. 2 feet long by 2 feet wide.
A this point I needed to take some measurements. My target cardboards are 40 inches tall by 30 wide.
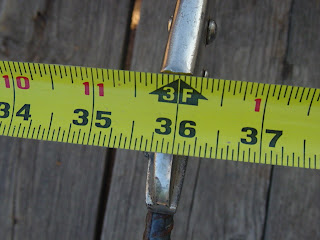
That gave me my final measurements for the target opening. I'll weld the 2 footers on the inside of the 6 foot uprights for a final width of right at 25 inches. I decided that 36 inches from the top was good for my cross brace.
First, square up the corners. Then weld a 2 foot section to one end of the 6 footers. This is the top of the stand.
25 inches wide.
I then marked a spot on each upright at 36 inches from the top and welded in the cross brace.
Remember I said the 2 pipes I welded into the footing to hold the uprights were too big? When I fitted the upper stand into the foot it wobbled badly. Now keep in mind I was working with whatever I had in the shop so please be kind. I had a piece of copper pipe with the correct inside diameter and 2 large square nuts that were the exact size I needed. I cut the copper so it would fit in the pipe flush and welded the nuts to the top. When I do another one I'll actually go out and buy some pipe that fits without going through gyrations to make it work. I swear. Probably. Maybe. (I won't).
The uprights now fit into the pipe perfectly. The stand is solid with no wobbling. You can see how the uprights fit into the footing.
Here's the stand complete but for the mounting system. It's 6 foot tall and 2 foot wide. It sits on a stand that's 2 foot by 2 foot. It may be too small but if so I can easily bend the feet or add length to them. Sarge and I talked about even adding claws to the feet or plates that we can stake to the ground.
On to the mounting system. Remember, I'm working with what I have. Anyone know what these are?
If you said "those wirish doodads one uses to mount things to peg board" you're obviously a Redneck. You would also be absolutely correct. I cut off the little single 'tail', leaving me with the other 2 for welding. Yes, that is a hand hacksaw. Please don't tell anyone. I don't want to lose my powertool cred.
Mounted and ready for welding. I sharpened the tips to make it easier to poke them through the cardboard. There are 2 at the top and 2 on the crossbrace.
Here's the final product with a cardboard attached. Angus insisted on modeling. Something about everything being better with a Lab. The mounting spikes are at the top and mid brace giving me 4 points of contact. If any one fails it'll still work. It'll even work if 2 fail, so long as one's at the top and the other at the bottom.
I know, the width of the stand is such that it it behind the edges of the cardboard. I built it this way for a couple of reasons.
Most of my targets, including the silhouettes, are 24 inches wide so good hits won't be an issue. The top and mid brace were always going to be behind the cardboard no matter what. I wanted a solid mount for the cardboard instead of relying on bunji's or similar. I like having something solid behind the target for it to push against. No blowing the target through this stand. Because I made it out of steel it'll be both tougher and easier to repair than PVC. It's round to full on hits will be rare and those that do hit shouldn't come back on the shooter (remember that shooting into steel is always dangerous. Wear your safety gear). I wanted it to be as small and light as I could manage while still being large enough for full sized targets.
The final weight of the entire stand was 10 pounds. As weighed on the calibrated, super accurate scales here at the Evil6 Incorporated R&D laboratories of course. Total outlay (minus the stuff I had 'just laying around') was 10 dollars and a couple of hours of work by Sarge and me. A lot of which was talking and lying about how well we shoot.
Will it work? Will it fall over in a mild breeze and completely mortify me? Will it break the first time Sarge or I hit it with anything larger than a BB gun and stubbornly refuse to be repaired? You'll just have to tune in later to find out. Sarge and I have a date at the Super Secret Evil6 Range Facility later this week. We'll put it through it's paces, including shooting it on purpose, and file a report. Backyard engineering. I dunno.
Success or abject failure. We shall see.
Six


2 comments:
My only recommendation would be that instead of adding claws to the base, I would just make four to eight u shaped stakes to hammer into the ground over the feet. That way for storage it will sit flat on the ground and there won't be claws to grab onto stuff during transport.
And yea, I have my redneck card :D
I like it Instinct. It continues the ideas of light weight and easy storage/transport. I'll make some up today and try it out.
Thanks!
Post a Comment