
This is a photo of the space from the doorway. Behind me is the wasted space we'll be incorporating into the remodel. To the right is the laundry room.To the left is the built in closet/dresser. In the bottom is a certain black dog. You can also see two windows. Besides being crappy wooden sash, single pane they're in the wrong place. The one on the right looks out on the back patio and will be taken out without replacement. The one straight ahead will come out and be replaced with a French door although probably not in the exact same spot. Note also the two slot holes in the walls by the corner. I checked to see and yep, there's no insulation in either exterior wall. Sigh. No wonder we had such a hard time controlling the temperature in that room. No matter, the drywall needed to come out anyway and insulation doesn't cost that much.

A better view of that built in. The thing was huge, running the width of the room and about 2 1/2 feet deep. Behind it is something very special as you will see. That's the entry doorway on the left leading to that frustrating wasted space.

I decided to take out the ceiling first, mostly to see what was up there and get an idea of what structural issues I was going to have to address. The ceiling was in two layers. First was acoustic ceiling tiles nailed to those lathe strips you can see. Under that was a second layer of acoustic ceiling tiles. Why two layers? I have no idea. The good news is that the joists are 2x6 dimensional lumber, 16 inches on center with fiberglass insulation. The better news is that I'll get back about 2 inches in ceiling height. Ceiling work in here is going to be minimal. I hope.

This is the ceiling in the wasted space. This is essentially a small room that had no use, nor could it be used for anything beyond staring at and wishing it had been incorporated into the bedroom in the first place. You can see the ceiling joists. They run at a 90 degree angle from those in the master bedroom and laundry room. I'll end up taking all these out as well as those in the laundry room and putting in new joists that run the length of both rooms, parallel to the master bedroom. Trust me, it'll all make more sense as the remodel proceeds.

And of course I had some expert consultations. "Ok Dad, here's what I think we should do..."

Ok, the ceiling is down, now it's time to tackle that built in. The thing was massively constructed. If The Meteor of Death had hit the house this thing would have emerged unscathed.
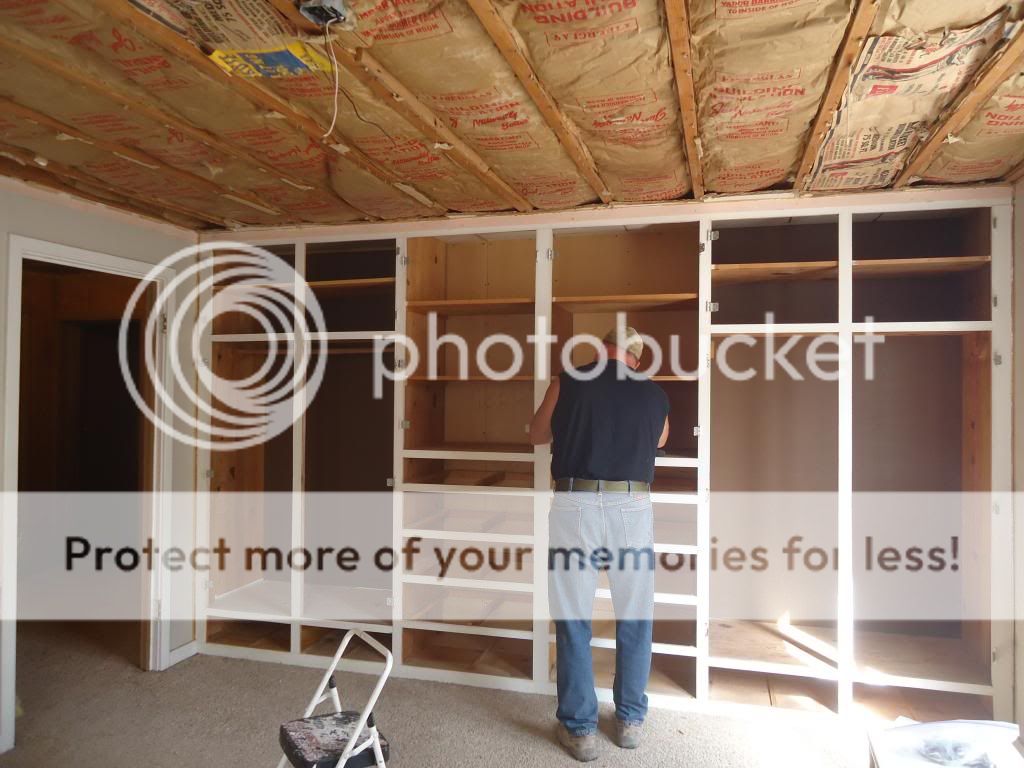
But we persevered and in the end it was gone. Please note the concrete slab. That's both good and bad. The good part is it's solid and no concrete will need to be poured. The bad is that I'll have to cut and jackhammer out the plumbing rough ins. The bathroom will be going in to the left in this picture with the walk in closet on the right. I have enough room to add in a 10x5 bathroom and a 7x5 closet while still increasing our space. What's behind that drywall? I'm glad you asked.

On the left there you can see a masonry wall. That's the old house exterior wall before the master bedroom was built. Behind it, to the left of the wall, is the spare bedroom. This space was created by building a bulkhead wall about two feet from the masonry wall. That bulkhead wall is the wall behind that built in I talked about above. In this space is the closet for the spare bedroom. I'm going to build a temporary wall in the master bedroom to support the ceiling joists and then tear all this out. I'll put in a nailer on the masonry wall and extend the ceiling joists (which are not load bearing besides their own weight and the ceiling drywall) and attach them to the nailer with joist hangers. That will open up all this space to add to the bathroom and new closet.

We did all this the first two days. In the next week we'll complete the demo, including tearing everything down to the bare studs and concrete slab. Then I have two walls to remove and some ceiling joists to replace/add/modify. When that's all done we'll measure everything out, do a layout on the floor and start building the new interior wall that will separate the master bedroom from the laundry room and new bathroom and closet. Did I mention the plumbing rough in through a concrete slab floor? Yeah, that's going to be a joy.
I anticipate this taking a little less time that the kids rooms did but that all depends on how things go and what hidden issues I find. We shall see.
Six
7 comments:
Looks like a blast! If I didn't have to wash my hair I would come out to help.
Oh, it's gotten even better. I'll call you with the details.
Busy beavers aren't we... :-) and interesting what one finds sometimes...
damn... you don't mind diving right into these DIY's do you?
Look forward to seeing the"after" photos!
All the Best!
You ain't kidding NFO. Wait until the next installment. We found more dead spaces than a Zombie flick!
It's the only way to do it Coop. Hold your nose and start tearing stuff down. That way you have no choice but to get it finished. Six's Remodel Theorem!
You are lucky...at least yours was built on 16" centers. Ours has random centers, ranging from around 12"-22" though mostly between 14
-18".
Ouch! Yep, this room has the best construction I've seen so far in this house. I'll have to do some structural work but thankfully not near as much as the kid's room.
Post a Comment